Arriving at a campsite is one of the most enjoyable moments of any RV trip. After the drive is finished and you’ve backed into your site, the next step is setting up your RV so it’s comfortable and ready to use. One of the first things experienced RV owners do after parking is level the RV properly.
Leveling an RV at a campsite is more important than many beginners realize. An RV that sits unevenly can cause several problems inside the coach. Refrigerators may not cool properly, cabinet doors can swing open or shut, and sleeping can quickly become uncomfortable when the RV is tilted to one side.
The good news is that learning how to level an RV at a campsite is a simple skill that becomes second nature after a few trips. Many towable RVs use leveling blocks and a tongue jack to level the trailer, while many motorhomes and some fifth wheels are equipped with automatic leveling systems that level the RV with the push of a button.
In this guide, we’ll walk through the correct process RV owners use to level their RV at a campsite. We’ll explain how manual leveling works, how leveling blocks are used, and how automatic leveling systems operate so you can set up your RV safely and quickly every time
you arrive at camp.
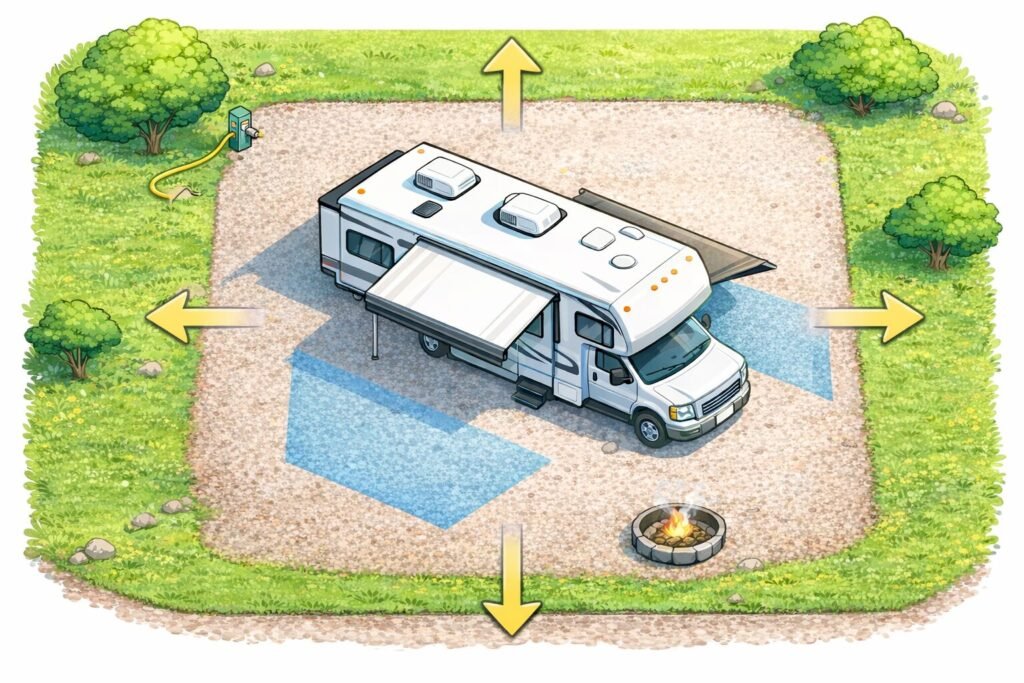
How to Level an RV at a Campsite: Position the RV
The leveling process begins as soon as the RV is parked in the campsite.
Pull forward slowly into the site and stop in the general position where you want the camper to sit. Try to center the RV in the space so you have enough room for your slide-outs, awning, and campsite setup. At this stage you are not trying to get the RV perfectly positioned yet — you are simply getting it close enough to evaluate the ground and see how level the site is.
Before doing anything else, step out of the RV and take a look at the campsite itself. Many sites have a slight slope from front to back or side to side. Some campgrounds intentionally slope their sites slightly for drainage, while others simply follow the natural terrain. Walking around the RV for a moment and looking at how the ground sits can give you a quick idea of which side of the camper may need to come up on leveling blocks.
Once the RV is roughly positioned, check the level of the camper. Many RV owners use small bubble levels mounted on the side of the RV or placed on the floor inside the coach. These are simple and reliable and give you a quick visual reference for which direction the RV is leaning.
However, bubble levels are not the only way to check level anymore. Many RV owners now use leveling apps on their phones that use the phone’s internal sensors or modules mounted inside the RV to measure tilt. These apps can show exactly how far off level the RV is from side to side or front to back. Some people simply place their phone on the floor inside the RV, while others use dedicated RV leveling apps that guide you through the process step by step.
Whether you use a traditional bubble level or a phone app, the goal at this stage is simply to determine which side of the RV is lower. If the passenger side of the RV is sitting lower than the driver side, that is the side that will need leveling blocks under the wheels.
Taking a moment here to understand how the RV is sitting on the site saves time later. A small adjustment in where you park can sometimes reduce how many leveling blocks you need, and occasionally you may find that the site is already close to level.
Once you know which side of the RV is lower, you’re ready to place the leveling blocks and make the adjustment.
Place the Leveling Blocks
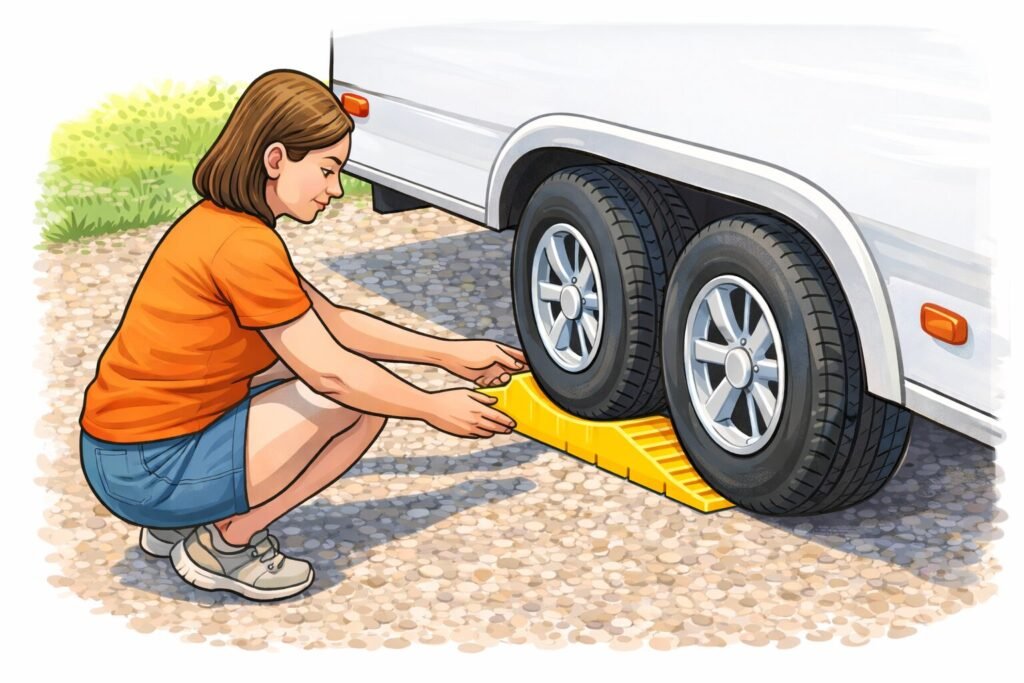
Once you’ve determined which side of the RV is sitting lower, the next step is placing leveling blocks where the tires will drive onto them.
Leveling blocks are one of the most common tools RV owners use to correct side-to-side tilt at a campsite. These blocks raise the low side of the RV slightly so the coach sits level. They are designed to support the weight of the tires while allowing you to make small adjustments to the height.
There are a few different types of leveling blocks that RV owners commonly use.
The most familiar style is the stackable plastic block system. These blocks work somewhat like large building blocks and can be stacked to create the height you need. RV owners will often arrange them in a small stair-step or ramp shape so the tire can roll smoothly onto the platform. This type works well because you can add or remove blocks depending on how uneven the campsite is.
Another popular option is the curved drive-on leveling block. These blocks are shaped like a gradual ramp. Instead of building a stack, you simply drive the tire up the curved surface until the RV becomes level. Many RV owners like this style because it allows for small adjustments without needing to move blocks around. You can slowly pull forward until the RV reaches the correct height.
There are also heavy-duty rubber leveling ramps designed for larger motorhomes and heavier RVs. These work similarly to curved leveling blocks but are built from solid rubber to handle the additional weight of larger coaches.
Regardless of the style you use, the placement principle is the same. The blocks should be positioned directly in front of the tires on the low side of the RV. If the passenger side of the RV is sitting lower than the driver side, the blocks should be placed in front of the passenger side tires.
Before moving the RV, take a moment to make sure the blocks are sitting flat on the ground and lined up with the tires. Gravel campsites can sometimes shift under the blocks, so pressing them firmly into the surface helps prevent them from sliding as the RV rolls forward.
Once the blocks are positioned correctly, the next step is slowly moving the RV forward so the tires climb onto the blocks and bring the RV closer to level.
Drive the RV Onto the Leveling Blocks
With the leveling blocks positioned in front of the tires on the low side of the RV, the next step is slowly moving the RV forward so the tires climb onto the blocks.
Move forward slowly and steadily so the tires roll onto the leveling blocks or ramp. As the tires climb up, the low side of the RV will begin to rise and the coach will start to come back toward level. Small movements are best here. It’s common to pull forward a little, stop, check the level, and then adjust again if needed.
If you’re traveling with someone else, it helps to have them stand outside the RV and guide you while watching the tire climb onto the blocks. They can signal when the tire is fully positioned. If you’re working alone, simply move forward a short distance at a time and check the level after each adjustment.
As soon as the RV appears close to level from side to side, stop and check your bubble level or leveling app again. If the RV is still slightly off, you may need to back down and add another block or reposition the ramp. This part of the process often takes a couple small adjustments to get it right.
One important detail many new RV owners don’t realize is that leveling should always be done with the slide-outs closed. Slide-outs add a significant amount of weight to one side of the RV. If you level the RV with the slides already extended, the coach can shift once the slides move, which may throw the RV back out of level. Leveling first ensures the RV frame is sitting correctly before the extra weight of the slide-outs is applied.
For RVs equipped with automatic leveling systems, the same principle applies. Automatic leveling jacks are designed to fine-tune the level of the coach, not to lift the entire RV dramatically off the ground. Ideally the RV should already be close to level before activating the automatic leveling system.
The goal is to use leveling blocks or careful positioning to get the RV close to level first. The automatic leveling system can then make the final small adjustments needed to bring the coach perfectly level.
Another important point is that stabilizer jacks should never be used to level the RV. Stabilizers are designed only to reduce movement once the RV is already level. They help keep the coach from rocking when people move around inside, but they are not strong enough to support the full weight of the RV. Trying to level the RV with stabilizers can damage the jacks or even twist the RV frame.
Once the RV is sitting level from side to side, the next step is securing the wheels with wheel chocks so the RV cannot roll while the rest of the campsite setup is completed.
Chock the Wheels
Once the RV is level from side to side and sitting securely on the leveling blocks, the next step is placing wheel chocks.
Wheel chocks prevent the RV from rolling forward or backward while it is parked. Even on campsites that appear fairly level, a small slope can allow the RV to move slightly if the wheels are not secured. Placing chocks behind the tires keeps the RV stable while you continue setting up the campsite.
Position the chocks firmly against the tires on the downhill side of the RV. If the campsite slopes slightly forward, place the chocks behind the rear tires. If the slope goes toward the back of the site, the chocks should be placed in front of the tires. Many RV owners choose to chock both sides of the tires for extra security.
Press the chocks tightly against the tire so there is no gap between the rubber and the chock. On gravel sites it can help to push the chock slightly into the ground so it stays in place.
If you are towing a travel trailer or fifth wheel, wheel chocks should always be installed before disconnecting from the tow vehicle. This prevents the RV from shifting when the weight of the hitch is released.
Motorhomes should also be chocked before leveling jacks are deployed, especially on sloped campsites.
If you’re new to RV setup and want a deeper explanation of why chocking matters and how to use them safely, see our full guide on RV wheel chocks and how to use them correctly.
Once the wheels are chocked, the next step is leveling the RV front to back using the tongue jack on a trailer or the leveling system on a motorhome.
Level the RV Front to Back
Once the RV is level from side to side and the wheels are securely chocked, the next step is leveling the RV from front to back.
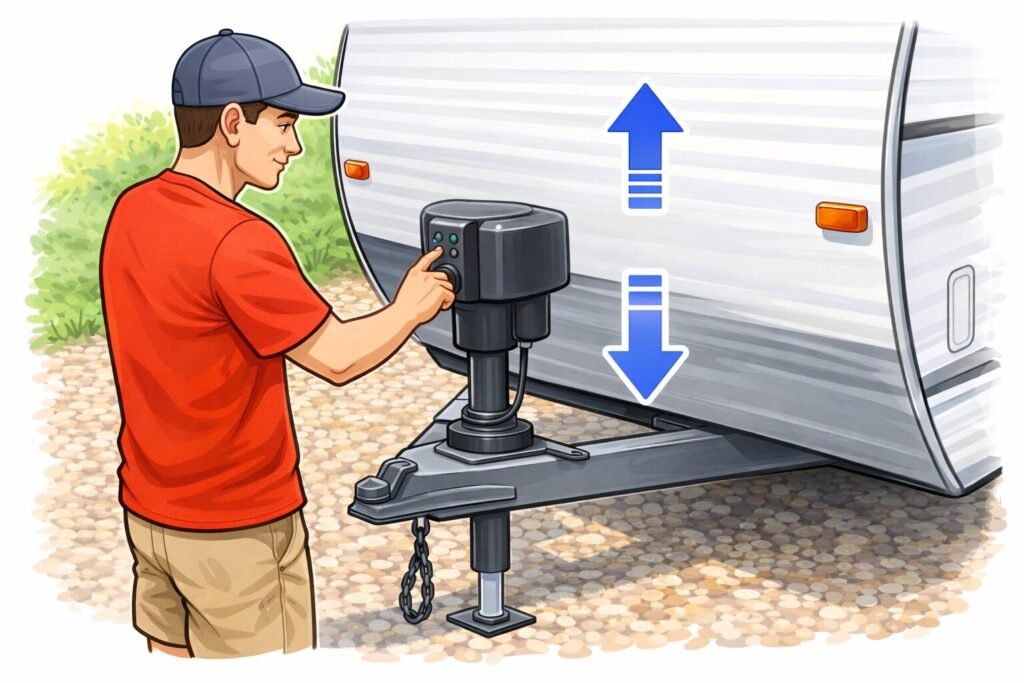
For travel trailers and many smaller towable RVs, this adjustment is made using the tongue jack. The tongue jack raises or lowers the front of the RV until the coach sits level from the front of the RV to the rear.
Start by checking the level inside the RV again. Many RV owners place a bubble level on the floor or countertop running lengthwise through the coach. If you are using a leveling app on your phone, place the phone flat on the floor and check the front-to-back measurement.
If the front of the RV is sitting too low, extend the tongue jack to raise it slightly. If the front is too high, lower the jack carefully until the RV sits level. Small adjustments are best here, as it only takes a small movement of the tongue jack to change the level of the RV.
For fifth wheels and motorhomes equipped with automatic leveling systems, this process is slightly different. Once the RV is parked and chocked, the automatic leveling system can be activated to bring the coach into its final level position.
Even with automatic leveling systems, it is still important that the RV is reasonably close to level before activating the system. Automatic jacks are designed to make small adjustments, not to compensate for extremely uneven campsites. If the jacks extend too far, they can lift the wheels partially off the ground, which reduces stability and puts unnecessary stress on the leveling system.
Most experienced RV owners try to park the RV so it is already close to level using leveling blocks or careful positioning before activating the automatic leveling feature.
Once the RV is level from both side to side and front to back, the coach is properly positioned and ready for the final step of stabilizing the RV at the campsite.
Lower the Stabilizer Jacks
Once the RV is level in both directions, the final step is lowering the stabilizer jacks.
Stabilizer jacks are designed to reduce movement inside the RV after it has already been leveled. When people walk around inside the coach, climb the steps, or move between rooms, the RV can rock slightly on the suspension. Stabilizer jacks help eliminate most of that movement and make the RV feel much more solid.
Lower each stabilizer jack slowly until it makes firm contact with the ground. Once the foot of the stabilizer touches the ground, apply just enough pressure to remove the movement from the RV. The goal is to stabilize the coach, not to lift it.
It’s important to remember that stabilizer jacks should never be used to level an RV. They are not designed to support the full weight of the coach, and trying to lift the RV with them can damage the jacks or place stress on the RV frame.
Leveling should always be done using the RV’s wheels, leveling blocks, tongue jack, or automatic leveling system. Stabilizers are simply the final step that helps keep the RV steady once the leveling process is complete.
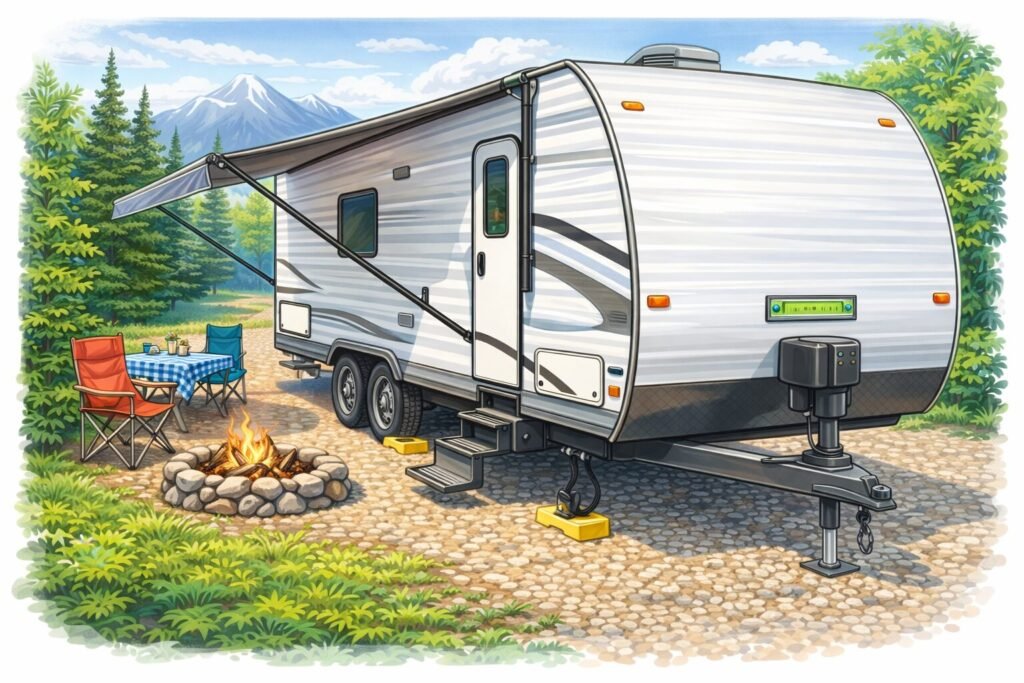
After the stabilizers are set, the RV should feel solid when walking inside. At this point the coach is properly positioned in the campsite and ready for the next part of campsite setup.
Most RV owners will now begin connecting campground utilities such as electrical power, fresh water, and sewer. If you want to see the full campsite arrival routine explained step by step, our complete RV campsite hookup guide walks through the entire process from parking to connecting utilities.
After the RV Is Level
Once the RV is level and stabilized, the campsite setup becomes much easier. Doors will operate correctly, the refrigerator can run properly, and the RV will feel stable when people move around inside.
At this point many RV owners extend their slide-outs if the coach is equipped with them. Because the RV was leveled with the slides closed, the frame is already sitting correctly, and extending the slides will not affect the level of the coach.
After the slides are out, the rest of the campsite setup usually follows a simple routine. Most RV owners connect electrical power first, then connect fresh water, and finally set up the sewer connection if they plan to stay for an extended period.
Understanding the correct order for connecting campground utilities can help prevent common mistakes that many new RV owners make when arriving at a campsite.
If you want to see the full setup process explained step by step, including how to safely connect power, water, and sewer hookups, see our complete guide here:
Following a consistent setup routine every time you arrive at a campground helps make RV travel easier and prevents many of the small problems that can happen when steps are done out of order.
Final Thoughts on Leveling Your RV
Leveling an RV at a campsite is one of the first skills every RV owner learns, and after a few trips it quickly becomes part of a simple routine. By taking a moment to evaluate the campsite, using leveling blocks when needed, and making small adjustments before finishing setup, you can have the RV sitting level in just a few minutes.
The key points to remember are to level the RV before extending slide-outs, always secure the RV with wheel chocks, and never attempt to level the coach using stabilizer jacks. Stabilizers are only meant to remove movement once the RV is already level.
For RVs equipped with automatic leveling systems, it is still important to begin with the RV reasonably close to level. Automatic jacks are designed to fine-tune the level of the coach, not to lift the RV dramatically off the ground. Keeping the wheels in contact with the ground helps maintain stability and prevents unnecessary stress on the leveling system.
Once the RV is level and stable, the rest of the campsite setup becomes much easier. From there you can extend the slide-outs, set up your campsite, and begin connecting the campground utilities.
With a little practice, leveling your RV becomes a quick and routine part of arriving at any campground.