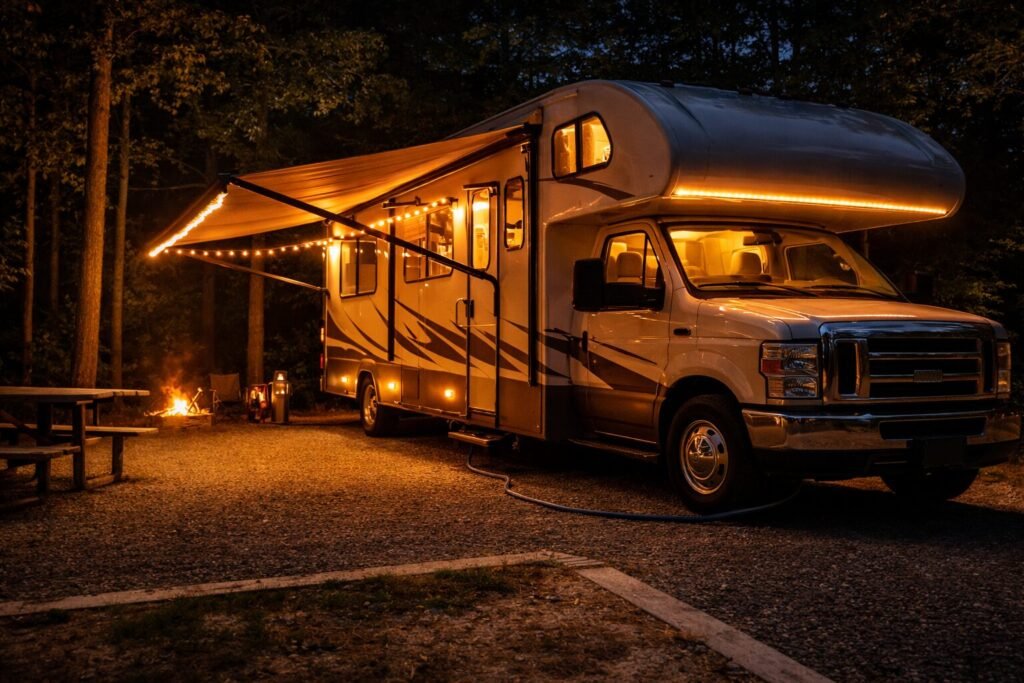
You flip on the air conditioner… and the breaker trips.
You unplug from shore power… and suddenly half your RV goes dark.
You switch to batteries… and wonder why the microwave won’t run.
If that sounds familiar, you’re not alone. RV electrical systems confuse a lot of new owners — not because they’re complicated, but because nobody explains how power actually flows through the rig. Words like 30 amp, 50 amp, converter, inverter, and battery bank get thrown around without context, and it leaves people guessing at the pedestal instead of feeling confident.
Here’s the truth: your RV runs on two completely different types of electricity that work together. One system powers heavy appliances like your air conditioner and microwave. The other powers lights, water pumps, furnace controls, and electronics. When you plug into shore power, start a generator, or rely on batteries while boondocking, electricity follows a specific path through breaker panels, fuse blocks, and charging systems inside your RV. Once you understand that path, everything starts to click.
In this guide, we’re going to break it down step by step in real-world terms. You’ll learn how 30 amp and 50 amp hookups actually differ, what your batteries truly run (and what they don’t), how converters and inverters fit into the system, and how to protect your RV from bad campground power. By the end, you won’t just know the terms — you’ll understand how your RV electrical system actually works.
Understanding your RV electrical system is one of the most important parts of safe and stress-free camping. Whether you drive a motorhome or tow a travel trailer, the way power moves through your RV follows the same core principles.
How RV Electrical Really Works (The 3 Power Worlds)
The simplest way to understand an RV electrical system is to realize it is not one single system. It is three separate power systems working together. Once you understand how those three “power worlds” interact, everything else — shore power, batteries, converters, inverters, tripped breakers — becomes logical instead of confusing.
The first power world is 120-volt AC power. This is the same type of electricity that runs your home. When you plug into a campground pedestal or start a generator, you are bringing 120-volt power into your RV. That power flows into your main breaker panel and feeds the heavy-demand appliances. Your air conditioner, microwave, standard wall outlets, and the electric side of your water heater all rely on this system. If you try to run too many high-demand appliances at once and a breaker trips, it is this 120-volt side that has been overloaded.
The second power world is 12-volt DC power. This is the battery side of your RV, and it is what makes the coach feel operational even when you are not plugged in. Your interior lights, water pump, furnace blower, vent fans, slide motors, tank monitors, and control boards for many propane appliances all run on 12 volts. Even when you are connected to shore power, these systems still operate on 12 volts. That surprises many new owners. If your battery is disconnected or completely dead, you can lose lights and water pump function even though you are plugged into a campground pedestal. The RV depends on a healthy 12-volt system for its core functions.
Your water pump, for example, is a 12-volt device, which is why understanding your water system matters just as much as your electrical setup. If you have not already, read our complete guide to how the RV water system works to see how the two systems connect.
The third power world is where those two systems meet. This is the charging and conversion side. When you plug into shore power, a device called a converter takes incoming 120-volt AC electricity and converts it into 12-volt DC power. That converted power runs your 12-volt systems and recharges your batteries at the same time. If your RV has an inverter, it works in the opposite direction. An inverter takes 12-volt battery power and converts it back into 120-volt AC power so you can operate certain outlets or appliances when you are not plugged in.
When you look at your RV through this lens, the flow becomes clear. Shore power or a generator feeds the 120-volt system. The converter turns some of that into 12 volts and maintains the batteries. The batteries supply the 12-volt system. If equipped, an inverter can turn battery power back into limited 120-volt power. Everything in your RV electrical system is built around that flow.
Shore Power Basics (30 Amp vs 50 Amp — No Confusion)
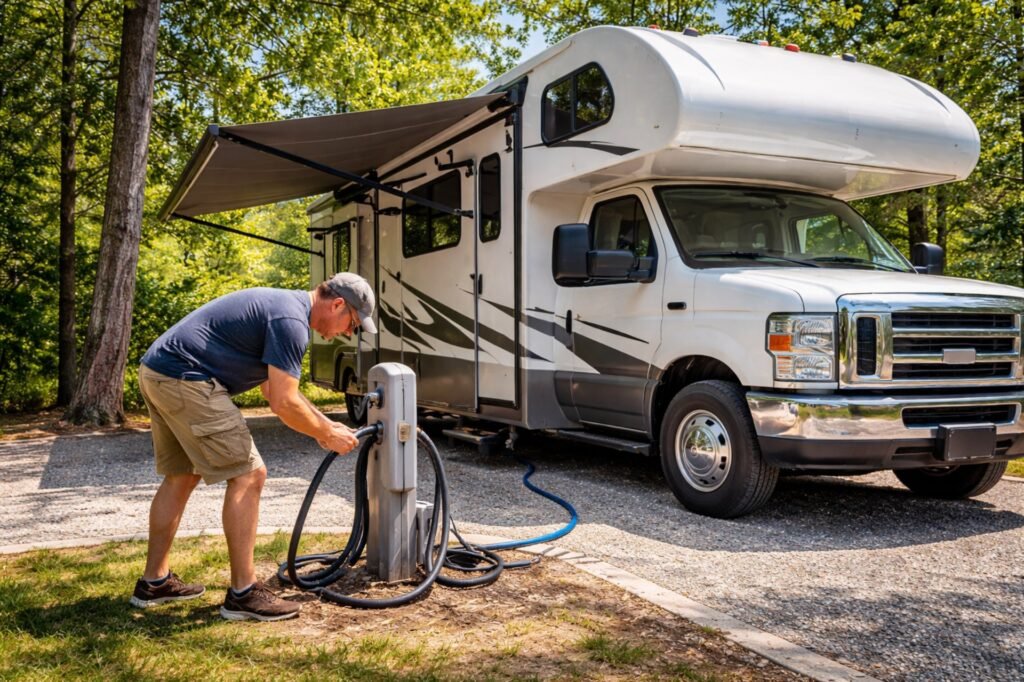
Shore power is simply the electricity you plug into at a campground pedestal. It is called “shore” power because the RV is connecting to an external source, just like a boat connects to power at a marina. When you plug in, your RV is no longer relying on batteries or a generator. It is drawing power directly from the campground’s electrical system.
Where most confusion starts is with the difference between 30 amp and 50 amp service.
A 30 amp RV connection supplies 120 volts of power through a single hot line. When you multiply volts by amps, you get available wattage. In a 30 amp RV, that equals about 3,600 watts of total available power. That is your entire electrical budget. Everything running on the 120-volt side of your RV must share that capacity. If you try to run the air conditioner, microwave, and a space heater at the same time, you will likely trip the breaker. It is not that something is broken. You simply exceeded your available supply.
A 50 amp RV connection works differently. It still provides 120 volts, but it delivers that power through two separate hot legs. Each leg can supply up to 50 amps. That means a 50 amp RV can access up to 12,000 watts of available power. This is why larger fifth wheels and motorhomes can run multiple air conditioners, residential refrigerators, and other high-demand appliances at the same time without constantly managing loads.
One of the most common misunderstandings is thinking that a 50 amp RV uses 240 volts like a house dryer outlet. In almost all modern RVs, that is not how it works. A 50 amp RV uses two separate 120-volt legs, not a single 240-volt appliance feed. The distribution panel inside the RV splits appliances across those two legs to balance the load.
Adapters add another layer of confusion. If you plug a 50 amp RV into a 30 amp pedestal using an adapter, you do not gain 50 amp capacity. You are limited to whatever the pedestal can supply. In that case, your 50 amp RV is effectively operating as a 30 amp unit, and you must manage loads accordingly. The adapter only changes the plug configuration. It does not increase available power.
The breaker on the campground pedestal is there to protect the supply line and prevent overload. The breakers inside your RV protect individual circuits. If you overload the system, one of those breakers will trip before wiring overheats. When that happens, it is not a failure. It is the system doing exactly what it was designed to do.
Understanding shore power comes down to one principle: you have a fixed amount of electricity available, and every appliance draws from that pool. On 30 amp service, that pool is smaller. On 50 amp service, it is much larger. Once you know your available capacity, managing power becomes predictable instead of frustrating.
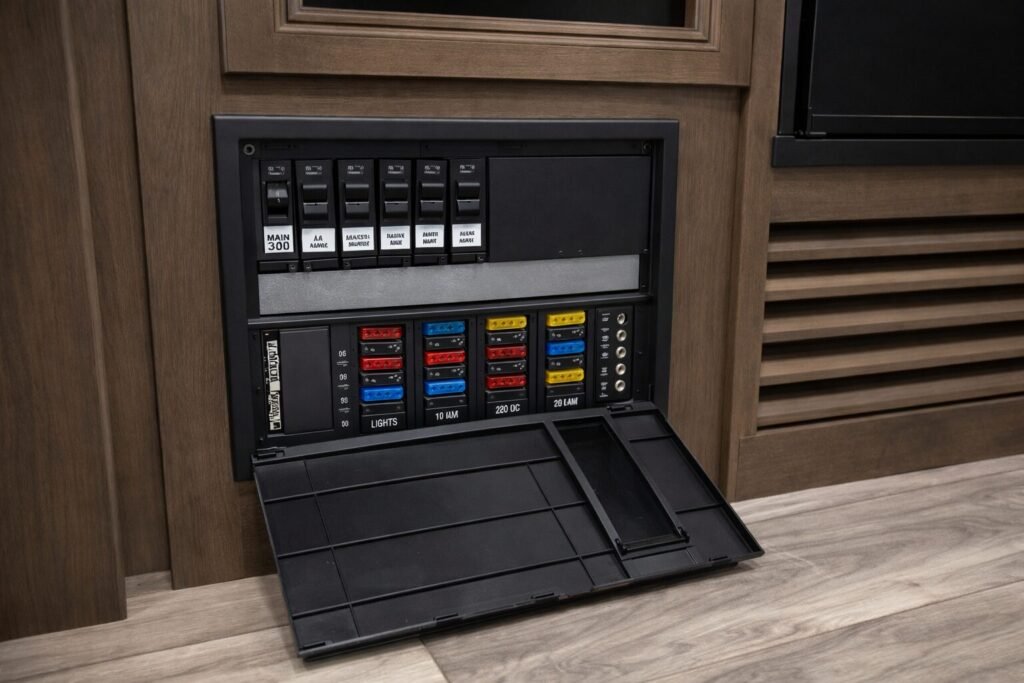
The RV Breaker Panel and Fuse Panel (What They Actually Do)
Once shore power enters your RV, it does not go straight to your appliances. It first passes through your distribution system. This is where the breaker panel and fuse panel come into play. They are the control center of your electrical system, and understanding their role removes a lot of guesswork when something stops working.
Your AC breaker panel handles the 120-volt side of the system. Power from the pedestal or generator flows into a main breaker, then gets divided into individual branch circuits. Each breaker protects a specific circuit, such as the air conditioner, microwave, water heater element, or general outlets. If a single breaker trips, only that circuit shuts down. If the main breaker trips, the entire 120-volt side of the RV goes dark.
Breakers are not random switches. They are safety devices. They trip when the circuit draws more amperage than it is rated for. That usually happens when too many appliances are running at once or when a device has developed a fault. Resetting a breaker is fine if it tripped from overload, but if it continues to trip repeatedly, that is a sign something needs attention.
Separate from the breaker panel is the 12-volt fuse panel. This panel protects the DC circuits that run off your battery system. Instead of breakers, it uses fuses. Each fuse is rated for a specific amperage and protects components like your water pump, lights, furnace blower, slide motors, tank monitors, and control boards. If one of those systems stops working, a blown fuse is often the first thing to check.
Many RVs combine the AC breaker panel and DC fuse panel into one unit, but they are still two completely separate systems inside that box. The breakers protect 120-volt circuits. The fuses protect 12-volt circuits. They serve the same purpose — preventing wiring from overheating — but they operate in different power worlds.
You may also notice a GFCI outlet somewhere inside your RV, often in the bathroom or kitchen. That outlet protects against ground faults and can shut off power to multiple downstream outlets. If several outlets suddenly stop working, checking the GFCI reset button is a smart first step. Many people assume they have a major electrical problem when it is simply a tripped GFCI.
When you understand the breaker and fuse panels as distribution and protection centers, troubleshooting becomes more logical. If a microwave stops working, you check the AC breaker. If the water pump stops running, you check the DC fuse. If everything on the 120-volt side is dead, you check the main breaker and pedestal supply.
The panel is not just a box of switches. It is the safety backbone of your RV electrical system. Once you know how it divides and protects power, you stop guessing and start diagnosing problems with confidence.
Converter vs Inverter (The Two Devices Everyone Mixes Up)
Few parts of an RV electrical system create more confusion than the converter and the inverter. The names sound similar, and many new owners assume they do the same thing. They do not. In fact, they perform opposite functions.
A converter is standard equipment in almost every RV. Its job is to take incoming 120-volt AC power from shore power or a generator and convert it into 12-volt DC power. That converted power does two things at the same time. It runs your 12-volt systems and it charges your batteries. When you are plugged into shore power, your lights, water pump, furnace controls, and other DC components are being supplied by the converter while your batteries are being maintained.
This is why your 12-volt systems continue to work even if your batteries are low, as long as you are plugged in. The converter is carrying the load and replenishing the battery bank. If the converter fails, you may notice dim lights, weak slide motors, or batteries that no longer charge while connected to shore power.
An inverter does the opposite. It takes 12-volt DC power from your batteries and converts it into 120-volt AC power. That allows you to run certain household-style outlets or appliances when you are not plugged into shore power. Depending on the size of the inverter and battery bank, this might power televisions, laptops, small kitchen appliances, or in larger systems, even a residential refrigerator.
However, an inverter does not create unlimited power. It simply converts stored battery energy. If your battery bank is small, the inverter’s runtime will be limited. Running high-demand appliances like microwaves or air conditioners off batteries requires a large battery bank and a properly sized inverter, which many standard RVs do not have.
Some RVs are equipped with a combination inverter-charger unit. This device functions as a converter when plugged into shore power and as an inverter when running off batteries. Higher-end motorhomes and larger fifth wheels often use this type of integrated system.
The easiest way to remember the difference is this: a converter turns campground power into battery power. An inverter turns battery power into household-style power. They move electricity in opposite directions.
Understanding which device your RV has, and what it is designed to do, eliminates a lot of frustration. If something is not charging, you think converter. If you want outlets to work while boondocking, you think inverter. Once you separate those roles clearly, the electrical system becomes much easier to manage.
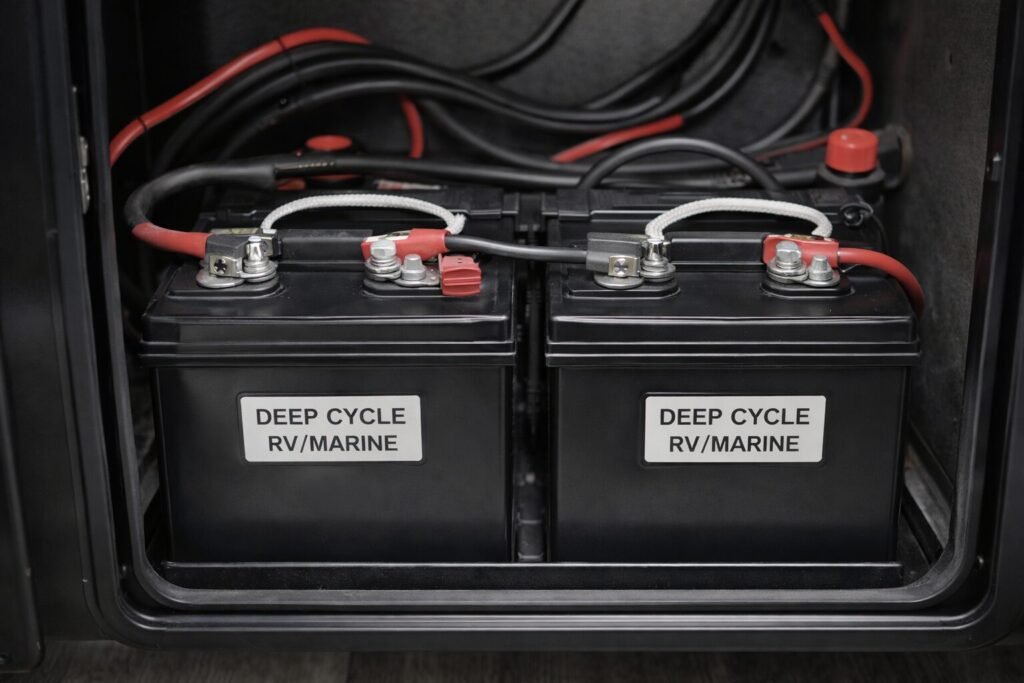
Batteries 101 (What They Actually Power and Why It Matters)
Your batteries are the backbone of the 12-volt side of your RV. Without them, the coach loses its core functionality. Lights may go out. The water pump stops. The furnace blower will not run. Even propane appliances rely on 12-volt control boards to operate. That surprises many new owners who assume propane systems work independently of electricity.
When you are unplugged from shore power, your batteries become the primary power source for all 12-volt systems. Every light you turn on, every time the water pump cycles, every fan that runs, draws energy from that battery bank. The more devices running, the faster the batteries discharge.
Even when you are plugged in, the batteries are still part of the system. The converter supplies 12-volt power and charges the batteries at the same time, but the battery remains connected and acts as a stabilizer. If the battery is weak, disconnected, or failing, you can experience dim lights, erratic slide movement, or systems that do not behave normally — even on shore power.
Most RVs come equipped with lead-acid batteries, either flooded or AGM. Flooded batteries require periodic maintenance and water checks. AGM batteries are sealed and maintenance-free but cost more. In recent years, lithium batteries have become increasingly popular because they provide more usable capacity, charge faster, and weigh less. However, lithium systems require compatible charging equipment and sometimes electrical upgrades to operate safely and efficiently.
Battery capacity is measured in amp-hours. That rating tells you how much energy the battery can store, but it does not mean all of it should be used. Traditional lead-acid batteries perform best when they are not discharged below roughly half of their capacity. Lithium batteries can safely discharge much deeper, which is one reason they are attractive for extended off-grid camping.
If your RV seems to struggle off-grid, the issue is often not the appliances. It is battery capacity. A single small battery can run lights and a water pump for a short period, but it will not support extended use without recharging. Larger battery banks allow for longer stays without hookups, but they also require proper charging through shore power, generator use, solar, or alternator input.
Understanding what your batteries actually power changes how you use your RV. You stop assuming everything runs the same way, and you begin managing energy intentionally. Lights and pumps are inexpensive loads. Air conditioners and electric heaters are not. Once you recognize that difference, off-grid camping becomes a matter of planning instead of trial and error.
Charging Sources (How Your Batteries Get Refilled)
Batteries do not create power. They store it. Once that stored energy is used, it has to be replaced. Understanding how your RV recharges its batteries is just as important as knowing what those batteries run.
The most common charging source is shore power. When you plug into a campground pedestal, your converter takes incoming 120-volt AC electricity and converts it into 12-volt DC power. That DC power both operates your 12-volt systems and recharges the batteries. As long as your converter is functioning properly, your batteries should remain charged while you are connected to shore power.
A generator works the same way. When running, it produces 120-volt AC power. That power flows through the same path as shore power, feeding your breaker panel and supplying the converter. From there, the converter handles charging duties. In practical terms, your RV does not care whether the AC power comes from a pedestal or a generator. The charging process is the same.
Solar power has become increasingly common, especially for owners who enjoy camping without hookups. Solar panels collect energy from the sun and send it through a solar charge controller before it reaches the batteries. The controller regulates voltage and current so the batteries charge safely and efficiently. Solar does not directly power your air conditioner or microwave. It replenishes your battery bank, and the batteries then supply your 12-volt system or feed an inverter if equipped.
Motorhomes and some towable RVs also receive charging from an alternator while driving. In a motorhome, the engine’s alternator charges the house batteries through a charging circuit. In a travel trailer or fifth wheel, the tow vehicle provides limited charging through the seven-way connector. This can help maintain battery levels during travel, but it is usually not strong enough to fully recharge a heavily discharged battery bank.
Each charging source feeds the same destination: your batteries. Shore power and generators supply AC power that gets converted. Solar supplies regulated DC power. Alternators supply vehicle-based charging while moving. The batteries act as the central storage point, and from there, your 12-volt systems operate normally.
When charging systems are working correctly, everything feels seamless. When something fails — such as a converter malfunction or a faulty solar controller — battery levels drop, lights dim, and systems behave unpredictably. Knowing where your batteries are supposed to be getting their charge makes diagnosing those problems much easier.
Electrical Safety at Campgrounds (Where Damage Usually Happens)
Most RV electrical system problems do not start inside the RV. They start at the campground pedestal.
When you plug into shore power, you are connecting your RV to wiring you do not control. That wiring may be old, poorly maintained, overloaded during peak season, or even incorrectly wired. In many cases it works fine. In some cases, it does not. Understanding this reality is critical to protecting your electrical system.
Low voltage is one of the most common issues at busy campgrounds. When many RVs are running air conditioners at the same time, the available voltage can drop below safe levels. Motors and compressors do not like low voltage. They draw more current to compensate, which creates heat and shortens the life of expensive components like air conditioners and refrigerators. You may not see sparks or smoke, but long-term damage can occur quietly.
High voltage is less common but just as dangerous. A surge or spike can damage circuit boards, control modules, and sensitive electronics in seconds. Modern RVs contain more electronics than ever before. Refrigerators, furnaces, water heaters, and leveling systems all rely on circuit boards that are expensive to replace.
Improper wiring at a pedestal can create even more serious problems. Reverse polarity, open grounds, and open neutrals are faults that can cause unpredictable behavior or equipment damage. In extreme cases, improper grounding can create what is known as a “hot skin” condition, where parts of the RV exterior become energized. While rare, this is why proper testing and protection matter.
This is where electrical management systems, often called EMS units, come into play. An EMS does more than act as a simple surge protector. It monitors voltage levels, detects wiring faults, and will automatically disconnect power if conditions fall outside safe limits. When the power stabilizes, it reconnects. That automatic protection can prevent thousands of dollars in damage.
Basic surge protectors offer limited protection against sudden spikes but typically do not guard against sustained low voltage or wiring faults. For owners who travel frequently or stay in older campgrounds, a full electrical management system is one of the most practical upgrades available.
Safe hookup habits matter as well. Always turn the pedestal breaker off before plugging in. After connecting your power cord and protection device, turn the breaker on. When disconnecting, turn the breaker off first. This reduces arcing at the plug and extends the life of your cord ends.
Electrical safety is not about fear. It is about understanding that campground power varies. Your RV’s internal systems are designed to distribute and manage electricity properly, but they cannot fix unstable supply conditions on their own. Protecting the incoming power is one of the simplest ways to preserve your RV’s electrical system for the long term.
Protecting your incoming power is just as important as using the correct sewer and water connections at a campsite. If you are new to full hookups, our sewer system guide explains how that side of the RV works in detail.
Load Management (Why Breakers Trip and How to Prevent It)
If you have ever turned on the microwave while the air conditioner was running and suddenly lost power, you have experienced load management the hard way.
Every RV has a fixed amount of available electrical capacity based on whether it is connected to 30 amp or 50 amp service. That capacity is not flexible. It is a limit. When the total demand of your appliances exceeds that limit, a breaker trips to protect the wiring from overheating.
On 30 amp service, you are working with roughly 3,600 watts of total available power. An air conditioner alone can draw 1,500 watts or more when running, and even higher for a brief moment during startup. A microwave can draw another 1,200 to 1,500 watts. Add a water heater running on electric mode, a coffee maker, or a space heater, and you can exceed your available supply quickly. The system is not failing when the breaker trips. It is protecting itself.
On 50 amp service, you have significantly more available power, but it is still possible to overload one leg of the system if too many high-demand appliances are on the same side of the distribution panel. Larger RVs are designed to balance loads across two legs, but understanding what is running at any given time is still important.
Low voltage conditions make load management even more critical. When campground voltage drops, motors and compressors draw more current to do the same work. That increases stress on the system and makes breaker trips more likely. It is one reason voltage monitoring and electrical protection are so valuable.
The key to managing loads is awareness. High-demand appliances include air conditioners, microwaves, electric water heaters, hair dryers, and portable space heaters. Lower-demand devices such as televisions, phone chargers, and LED lights have minimal impact. When on limited service, staggering high-demand appliances prevents overload. Turning off the water heater’s electric element before running the microwave, for example, can make the difference between smooth operation and a tripped breaker.
Some larger RVs include energy management systems that automatically shed loads when capacity is reached. These systems temporarily disable certain appliances to prevent overload and then restore them once demand decreases. Even without automated systems, manual load management is simply a matter of understanding your available capacity and planning accordingly.
When you recognize that your RV has an electrical budget, and every appliance draws from it, breaker trips stop feeling random. They become predictable and avoidable.

VERSATILE FUNCTIONALITY: Measures AC/DC voltage up to 600V, 10A DC current,
Common RV Electrical Problems (And How to Troubleshoot Them)
Electrical issues in an RV often feel bigger than they are. When something suddenly stops working, it is easy to assume the worst. In reality, most electrical problems follow a predictable pattern and can be diagnosed step by step if you understand how power flows through the system.
If you lose all 120-volt power, start at the source. Check the campground pedestal breaker first. If it has tripped, reset it once. If it trips again immediately, something inside the RV may be overloading the system. If the pedestal breaker is on, move inside and check your main breaker panel. A tripped main breaker will shut down the entire 120-volt side of the coach. If only one appliance is not working, look for a tripped branch breaker dedicated to that circuit.
If several outlets suddenly stop working but others still have power, check the GFCI outlet. Many RVs wire multiple outlets downstream from a single GFCI. If that outlet trips, it can shut off power to the bathroom, kitchen, and even exterior outlets at the same time. Resetting it may restore everything immediately.
When 12-volt systems fail, the troubleshooting path is different. If lights are dim or the water pump will not run, check the battery condition first. Verify that the battery disconnect switch has not been turned off. Inspect the battery terminals for loose or corroded connections. If the RV is plugged in but the battery is not charging, the converter may not be functioning properly. In some cases, reverse polarity protection fuses near the converter can blow and prevent charging even though other systems appear normal.
A common complaint is batteries that do not hold a charge. Over time, lead-acid batteries lose capacity, especially if they have been deeply discharged repeatedly. A battery that reads normal voltage when resting but drops quickly under load may be nearing the end of its life. Testing under load provides more useful information than voltage alone.
If breakers trip repeatedly when a specific appliance runs, that appliance may be drawing excessive current or developing a fault. Microwaves, air conditioners, and portable heaters are common culprits. Eliminating other loads and testing the appliance alone can help determine whether the issue is overall capacity or a specific component.
When diagnosing electrical issues, follow the power flow. Start at the source and move inward. Pedestal, cord, protection device, main breaker, branch breaker, appliance. On the 12-volt side, battery, disconnect switch, fuse panel, individual circuit. This methodical approach prevents unnecessary part replacements and reduces frustration.
Most RV electrical systems are straightforward once you understand their structure. Problems are rarely mysterious. They are usually a matter of interrupted flow, overloaded capacity, or a protective device doing its job.

Offers 3,000 Joules of advanced surge protection for your coach. It features advanced circuit analysis to automatically shut off power in an emergency
Upgrades That Actually Matter (And Which Ones Don’t)
Electrical upgrades can either make your RV more reliable and enjoyable, or they can add unnecessary complexity. The key is choosing improvements that solve real problems instead of simply adding capacity you may never use.
For most RV owners, the most important upgrade is proper power protection. A true electrical management system monitors voltage, detects wiring faults, and disconnects power if conditions become unsafe. Modern RVs rely heavily on electronic control boards, and unstable campground power can damage them quickly. Protecting the incoming supply is one of the smartest investments you can make, especially if you travel frequently or stay in older parks.
Battery upgrades are valuable when they align with how you camp. If you spend most of your time connected to shore power, a large lithium battery bank may not provide meaningful benefit. If you regularly camp without hookups, increasing battery capacity can dramatically improve comfort and flexibility. Lithium batteries offer deeper usable capacity and faster charging, but they require compatible converters or inverter-chargers and thoughtful installation.
Solar systems are another practical upgrade for off-grid camping. Solar does not power heavy appliances directly. It replenishes your batteries during daylight hours, reducing generator use and extending your stay without hookups. The size of the system should reflect your actual daily usage rather than a theoretical maximum.
Inverters should also be chosen carefully. A larger inverter does not create more power. It only converts stored battery energy into usable AC power. If the battery bank is undersized, runtime will be limited. For many RV owners, a moderate inverter that powers select outlets is sufficient. Attempting to run high-demand appliances like air conditioners from batteries requires significant investment and careful system design.
One often overlooked upgrade involves replacing inexpensive factory electrical components. Many RVs are built with cost-effective outlet boxes, lightweight plastic junction boxes, and basic transfer switches. Over time, these components can loosen, overheat, or degrade. Upgrading to higher-quality outlet boxes, properly secured junction boxes, and well-rated transfer switches can improve long-term reliability. Inspecting and tightening connections, especially at the main cord entry and distribution panel, also helps prevent heat buildup and intermittent power loss.
There are upgrades that sound impressive but offer little real-world benefit. Replacing wiring without documented issues rarely improves performance. Adding unnecessary complexity without fully understanding the system can make troubleshooting more difficult later.
The most valuable upgrades improve safety, reliability, and usability without overcomplicating the electrical system. Before investing, it helps to ask whether the upgrade solves a specific limitation you experience or simply adds features you may rarely use.
Choosing wisely ensures your RV electrical system remains dependable rather than unnecessarily complicated.
If you are building out your essential setup kit, power protection should be near the top of the list. Our RV Starter Essentials guide outlines the core items every new owner should carry:
Electrical Maintenance Checklist (Keeping the System Reliable)
An RV electrical system does not require constant attention, but it does require consistent inspection. Most electrical failures are not sudden. They develop over time from loose connections, corrosion, heat buildup, or neglected batteries. A simple maintenance routine prevents small issues from turning into expensive repairs.
Start with the battery bank. Inspect terminals regularly for corrosion or looseness. Even a slightly loose connection can cause voltage drops, dim lights, or erratic system behavior. Clean terminals as needed and ensure cables are tight. For flooded lead-acid batteries, check electrolyte levels periodically and maintain proper fluid levels. If batteries sit unused for long periods, verify they are either disconnected or maintained with a proper charging source.
Next, inspect your power cord and plug ends. Look for discoloration, melting, or signs of heat at the blades. Heat damage often indicates a loose connection either at the plug or inside the pedestal. If a cord end feels excessively warm after running high loads, that is a warning sign worth investigating. Replacing a worn plug end early is far less expensive than repairing a damaged distribution panel.
Open the electrical panel occasionally and visually inspect for loose wires or signs of overheating. You are not modifying anything. You are simply looking for burned insulation, discolored breakers, or connections that appear loose. If you are not comfortable inspecting inside the panel, a qualified technician can perform this check during routine service.
Check the operation of your converter or inverter by verifying proper battery charging voltage while connected to shore power. A healthy charging system maintains batteries within appropriate voltage ranges. Batteries that remain undercharged shorten their lifespan significantly.
Test GFCI outlets periodically to ensure they trip and reset properly. These outlets protect against ground faults and should function reliably. Also verify that smoke, carbon monoxide, and propane detectors are operational, as many of them rely on 12-volt power.
Before each trip, make it a habit to inspect the campground pedestal visually before plugging in. Look for burned outlets, loose connections, or obvious damage. Use safe hookup procedures by turning the breaker off before connecting and disconnecting your cord.
Electrical maintenance is less about constant adjustment and more about observation. When you routinely look for early warning signs — loose terminals, heat discoloration, low battery voltage — you prevent unexpected failures on the road.
A well-maintained RV electrical system operates quietly in the background. It does not demand attention when everything is functioning properly. With a clear understanding of how power flows and a simple inspection routine, you can travel confidently knowing your system is safe, protected, and dependable.
Frequently Asked Questions About RV Electrical Systems
Even after understanding how power flows through an RV, a few questions tend to come up repeatedly. Clearing these up removes the last layer of confusion.
One of the most common questions is whether 30 amp service is 110 or 220 volts. In a typical RV setup, 30 amp service supplies 120 volts through a single hot leg. It is not 240 volts like a residential dryer outlet. A 50 amp RV connection also supplies 120 volts, but through two separate legs, which increases total available capacity.
Another common question is whether you can plug a 50 amp RV into a 30 amp pedestal. The answer is yes, with the proper adapter. However, the available power is limited to what the pedestal provides. A 50 amp RV connected to a 30 amp source must operate within 30 amp limits. The adapter changes the plug configuration, not the available capacity.
Many owners also wonder why their microwave or air conditioner will not run when they are not plugged in. In most standard RVs, those appliances require 120-volt AC power and cannot operate from batteries alone unless the RV is equipped with a sufficiently sized inverter and battery bank. The presence of a battery does not automatically mean all outlets are powered.
Another frequent concern involves dimming lights when a water pump or furnace runs. This is usually a normal sign of voltage drop on the 12-volt system, especially if the battery is partially discharged. If the dimming is excessive or constant, it may indicate a weak battery or a loose connection.
Some owners ask whether they truly need an electrical management system. While not mandatory, it provides protection against unstable campground power conditions such as low voltage, high voltage, and wiring faults. Considering the cost of replacing modern electronic components, many experienced RVers view it as inexpensive insurance.
Finally, there is often confusion about why 12-volt systems stop working even when plugged into shore power. In most RVs, the battery remains part of the circuit. If it is disconnected or severely depleted, the 12-volt system can behave unpredictably even with shore power connected. A functioning converter and healthy battery are both important for stable operation.
Understanding these common points of confusion reinforces everything covered in this guide. RV electrical systems are not mysterious. They are structured, logical, and predictable once you understand how the pieces fit together.
Operating Your RV Electrical System With Confidence
An RV electrical system is not complicated once you understand how power flows. It is a coordinated system built around three core functions: delivering 120-volt power for heavy appliances, supplying 12-volt power for essential coach systems, and converting and charging between the two.
When you plug into shore power, electricity enters through the pedestal and flows to your breaker panel. From there, it feeds high-demand appliances and supplies your converter, which supports and charges the 12-volt side. Your batteries store energy for times when you are unplugged, keeping lights, pumps, furnace controls, and other core systems running. If your RV is equipped with an inverter, stored battery power can be converted back into usable household-style electricity when needed.
Once you understand that flow, the system becomes predictable. Breakers trip because loads exceed available capacity. Batteries drain because energy is being used faster than it is being replaced. Charging sources restore what has been consumed. Each component has a specific role, and when those roles are clear, troubleshooting becomes logical instead of frustrating.
Confidence comes from awareness and routine inspection. Protect incoming power at the pedestal. Monitor battery condition. Manage high-demand appliances within your available amperage. Check connections periodically for signs of heat or corrosion. These habits prevent most common electrical problems long before they become costly repairs.
When you operate your RV electrical system intentionally rather than reactively, you eliminate guesswork. You stop wondering why something shut off and start understanding why it did. That clarity allows you to focus on travel and enjoyment instead of chasing electrical issues at the campsite.
If this guide helped you understand your RV electrical system more clearly, take the next step and review your entire campsite setup. Electrical, water, and sewer systems all work together, and the more you understand each one, the more confident you will be at every campground.
Explore our complete system guides and starter essentials in the Free RV Guides section to build a setup that is safe, simple, and reliable