Pulling into a campsite after a long drive is one of the best parts of RV travel. The truck or motorhome is finally shut off, you step outside, and it’s time to start setting up your campsite for the night.
Most new RV owners naturally focus on the big things first — leveling the RV, plugging into campground power, or connecting the water hose. Those are all important parts of campsite setup, and we cover each of those systems in other guides here on the site.
But before any of that happens, there is one small safety step that should always come first.
Securing the wheels.
Whether you’re driving a motorhome or towing a travel trailer or fifth wheel, an RV can still move slightly after it’s parked if the tires are not properly blocked. Campsites are rarely perfectly level. Even a small slope or uneven ground can allow the RV to shift a few inches once the parking brake is released or the tow vehicle is disconnected.
Sometimes the movement is barely noticeable. Other times it can make leveling more difficult or cause the RV to settle in an unexpected way. In rare situations, an unsecured RV can even begin rolling slowly downhill.
That’s where RV wheel chocks come in.
RV wheel chocks are placed tightly against the tires to help prevent the RV from moving once it’s parked. Different styles of chocks are designed to do this in slightly different ways, but they all serve the same purpose — helping keep the RV safely in position while you finish setting up your campsite.
Even though they are small and inexpensive, wheel chocks are one of the most important pieces of safety equipment every RV owner should carry. They stabilize the RV before leveling begins, prevent movement during campsite setup, and help keep the coach securely in place throughout your stay.
In this guide, we’ll explain why RVs can still move after they are parked, how wheel chocks work to prevent that movement, when they should be placed during campsite setup, and the common mistakes many first-time RV owners make when using them.
Once you understand this simple step, setting up your RV safely becomes much easier every time you arrive at a campsite.
What Are RV Wheel Chocks?
RV wheel chocks are blocks designed to keep an RV’s tires from moving after the vehicle has been parked. They are placed snugly against the tire to prevent rolling caused by slopes, shifting weight, or movement inside the RV.
Wheel chocks are commonly used with travel trailers, fifth wheels, and motorhomes when parked at campsites or storage locations.
When Should RV Wheel Chocks Be Used?
Wheel chocks should be placed immediately after the RV is parked and before leveling the RV or connecting campground utilities. Securing the wheels first helps prevent the RV from shifting or rolling away while you are setting up the campsite.
Are Wheel Chocks Necessary for Motorhomes?
Yes. Even motorhomes benefit from wheel chocks, especially when parked on sloped or uneven campsites. While the parking brake holds the vehicle, wheel chocks provide an additional layer of stability and help prevent small movements while people are walking inside the RV.
Why RVs Roll at Campsites
At first glance, it seems like an RV should stay exactly where it’s parked. Travel trailers, fifth wheels, and motorhomes weigh thousands of pounds, and when they are sitting still it feels like that weight alone should keep them firmly planted on the ground.
But RVs sit on rubber tires, and tires are designed to flex and roll. That combination of weight, tire flexibility, and uneven ground means an RV can still move slightly or even a lot, even after it has been parked.
One of the biggest factors is the slope of the campsite. Campgrounds are built to drain water away from campsites and roadways, which means most sites are not perfectly flat. Even a very small slope can allow an RV to roll a few inches if the wheels are not blocked.
Many campsites also sit on surfaces like gravel, dirt, or grass. These materials can shift slightly under the weight of the RV. As the tires settle into the ground, the RV may move just enough to change its position.
Weight transfer is another common cause of movement.
With towable RVs like travel trailers and fifth wheels, the weight of the trailer is partly supported by the tow vehicle while you are driving. When you arrive at a campsite and begin disconnecting from the truck, that weight shifts to the trailer jack and the RV’s suspension. As the weight redistributes, the tires can roll slightly before the RV fully settles.
Leveling can also cause movement. When leveling jacks or stabilizers begin lifting one side of the RV, they shift the weight of the coach. As that weight shifts, the tires can move a little on the ground if nothing is holding them in place.
Even normal activity inside the RV can cause small movements. People walking around, extending slide-outs, filling water tanks, or loading gear can change the balance of weight inside the RV. On a sloped or loose surface, those small changes can allow the tires to shift.
Motorhomes can experience similar movement as well. While the parking brake helps hold the vehicle in place, it only locks the drivetrain, not the wheels themselves. On uneven ground or slippery surfaces like gravel or wet grass, the tires can still move slightly before leveling jacks are deployed.
In most situations the movement is small, but even a few inches can matter. A small shift can make the RV harder to level, change the position of the hitch on a towable RV, or put extra stress on stabilizer jacks.
That’s why experienced RV owners secure the wheels first when they arrive at a campsite. By placing wheel chocks firmly against the tires before doing anything else, you prevent that small amount of movement and keep the RV exactly where it was parked.
How RV Wheel Chocks Work
At first it may seem surprising that a small block placed against a tire can stop an RV that weighs several thousand pounds. The reason wheel chocks work so well comes down to simple physics and the shape of the chock itself.
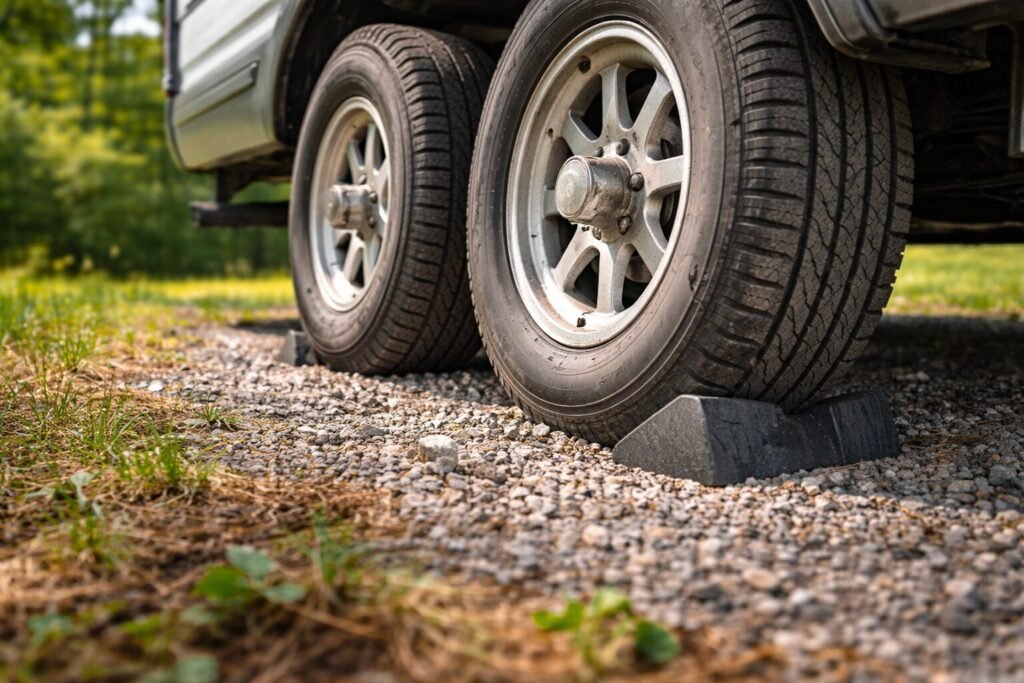
Most RV wheel chocks are designed with a wedge shape. One side sits flat on the ground, while the angled side presses firmly against the tire. When the chock is pushed tightly into position, the tire rests against that angled surface.
Once the tire is pressed against the chock, the RV would have to climb up the wedge in order to roll forward or backward. Because the chock is sitting on the ground and the RV is pushing downward with thousands of pounds of weight, the tire cannot easily climb over it.
Instead, the tire presses the chock more firmly into the ground.
The downward force from the weight of the RV increases friction between the chock and the surface underneath it. That friction helps hold the chock in place while the tire presses against it. As a result, the wheel is effectively blocked from moving.
This is why wheel chocks should always be placed tightly against the tire. If there is a gap between the tire and the chock, the RV could roll slightly until the tire makes contact.
Many RV owners also place chocks on both sides of a tire when possible. Blocking the wheel from both directions helps prevent movement forward or backward, especially on campsites that are not perfectly level.
Different styles of wheel chocks use slightly different designs to accomplish the same goal. Some rely on simple rubber or plastic wedges placed against the tires, while others expand between two tires on tandem axle trailers to lock the wheels together.
Regardless of the style, the purpose is always the same — preventing the tires from rolling so the RV stays safely in place while you finish setting up your campsite.
When to Place Wheel Chocks
One of the most important things to understand about wheel chocks is when they should be placed during campsite setup. Many new RV owners focus on leveling the RV first or start connecting utilities right away, but experienced RVers usually follow a different order.
Wheel chocks should be placed immediately after the RV is parked and before any other setup steps begin.
Once you position the RV in the campsite and stop the tow vehicle or motorhome, the next step should be securing the wheels so the RV cannot move. Placing wheel chocks at this point helps prevent the RV from shifting while you complete the rest of the setup process.
For towable RVs like travel trailers and fifth wheels, this step is especially important before disconnecting from the tow vehicle. When the trailer is still connected to the truck, the hitch helps hold the trailer in place. As soon as the hitch is released and the tongue jack begins supporting the trailer, the weight distribution changes and the trailer may move slightly if the wheels are not chocked.
By placing wheel chocks before disconnecting, you ensure the trailer stays exactly where it was positioned when you backed into the campsite.
Motorhome owners should also chock the wheels after parking and before leveling the coach. While the parking brake holds the vehicle, wheel chocks provide an additional layer of security, especially on uneven ground or gravel campsites where tires may shift slightly.
A typical campsite setup sequence often looks something like this:
- Position the RV in the campsite
- Place wheel chocks against the tires
- Level the RV using leveling blocks or leveling jacks
- Connect electrical power at the pedestal
- Connect fresh water and sewer if needed
Following this order keeps the RV stable throughout the entire setup process.
Once the wheels are secured with chocks, you can move on to leveling the RV and connecting the campground utilities with confidence that the RV will stay in position.
Types of RV Wheel Chocks
Not all wheel chocks are the same. While they all serve the same basic purpose — preventing the RV from rolling — different designs are used depending on the type of RV and the level of stability the owner wants.
Most RV owners end up carrying one of the following types.
Wedge Wheel Chocks
The most common type of RV wheel chock is the simple wedge-style chock. These are usually made from hard plastic or rubber and have a triangular shape that allows them to sit firmly against the tire.
To use them, the chock is pushed tightly against the tire on the downhill side of the wheel. The angled shape prevents the tire from rolling over the block.
These chocks are inexpensive, lightweight, and easy to store, which makes them very popular with travel trailer and motorhome owners. Many RV owners carry several of them so they can block both sides of the tires when needed.
Rubber Wheel Chocks
Rubber chocks work in the same way as wedge chocks but are made from heavy rubber instead of plastic. Because rubber grips the ground more effectively, these chocks tend to stay in place better on smooth surfaces like concrete or asphalt.
They are also heavier, which helps prevent them from sliding if the RV shifts slightly while settling.
Many experienced RV owners prefer rubber chocks because they provide a little more traction and durability compared to lightweight plastic versions.
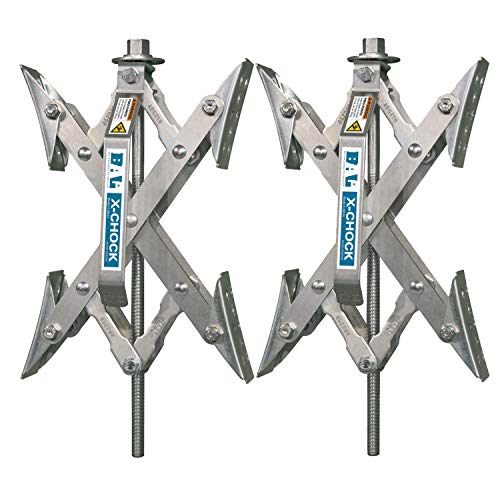
X-Chocks (Tandem Wheel Stabilizers)
X-chocks are designed specifically for RVs with tandem axles, such as many travel trailers and fifth wheels.
Instead of being placed in front of or behind the tire, X-chocks fit between the two tires and expand outward to press against both wheels. This locks the wheels together and helps prevent them from rolling.
While they do help reduce movement between the tires, it’s important to understand that most manufacturers still recommend using traditional wheel chocks as well. X-chocks are better thought of as stabilizers, not a full replacement for regular chocks.
Heavy-Duty Wheel Chocks
Some RV owners choose larger, heavy-duty chocks designed for bigger motorhomes or heavy trailers. These are often made from reinforced rubber or metal and provide additional stability for larger vehicles.
They are commonly used with Class A motorhomes, large fifth wheels, or RVs that are parked on steeper surfaces.
Common Wheel Chock Mistakes
Wheel chocks are simple to use, but there are a few common mistakes that new RV owners sometimes make when setting up their campsite. Avoiding these mistakes helps keep the RV stable and makes the entire setup process easier.
Placing Wheel Chocks Too Late
One of the most common mistakes is placing wheel chocks after leveling the RV or after disconnecting from the tow vehicle.
Wheel chocks should be placed immediately after the RV is positioned in the campsite. Waiting until later in the setup process allows the RV to shift while leveling or while weight is being transferred off the tow vehicle.
By placing chocks first, you prevent the RV from moving during the rest of the setup process.
Leaving a Gap Between the Tire and the Chock
Wheel chocks only work properly when they are pressed firmly against the tire.
If there is space between the tire and the chock, the RV may roll slightly until the tire contacts the block. Even a few inches of movement can shift the RV out of position or make leveling more difficult.
Always push the chock snugly against the tire so it is fully blocking the wheel.
Using Only One Chock When Two Are Needed
Some RV owners place a chock on only one side of the tire. While this can help on perfectly level ground, it may not be enough if the campsite has even a small slope.
Placing chocks on both sides of a tire helps prevent movement in either direction and provides better stability.
Many experienced RV owners carry multiple chocks so they can secure both sides of the wheels when needed.
Relying Only on Stabilizer Jacks
Stabilizer jacks are designed to reduce movement inside the RV after it has been leveled, but they are not intended to stop the RV from rolling.
Using stabilizer jacks without wheel chocks can allow the RV to shift slightly while the jacks are being lowered.
Wheel chocks should always be placed first, followed by leveling and stabilizing the RV.
What I Use and Recommend
I’ve found that using two types of wheel chocks together gives the best stability at a campsite. Each style does a slightly different job, and when used together they keep the RV much more secure.
Rubber wedge chocks are the first thing I place once the RV is parked. These go directly against the tire to stop the RV from rolling forward or backward on a slope. I like rubber versions because they grip gravel, dirt, pavement, and grass better than hard plastic chocks, and they don’t slide around as easily when the ground isn’t perfectly level.
Once the wheels are secured with wedge chocks, I add X-chocks between the tires on tandem-axle trailers. X-chocks expand between the two tires and lock them in place, which helps prevent the small forward-and-back movement that travel trailers sometimes have when people walk inside.
That combination makes a big difference. The wedge chocks stop the RV from rolling, and the X-chocks help stabilize the trailer so it doesn’t shift or rock while you’re inside.
It’s a simple setup, but it works extremely well at almost any campground.

| 
|
$57.88
| |
Final Thoughts
Wheel chocks may not be the most exciting piece of RV equipment you carry, but they are one of the most important when it comes to campsite safety and stability. They are small, inexpensive, and easy to store, yet they play a critical role in keeping your RV exactly where you parked it.
Most campsites are not perfectly level. Even when a site looks flat at first glance, there is often a slight slope built into the ground to allow rainwater to drain away. Gravel, grass, and dirt surfaces can also shift slightly under the weight of the RV as the tires settle.
Because RVs sit on rubber tires, they can still move a little after being parked. That movement may only be an inch or two, but it can happen when the tow vehicle is disconnected, when leveling jacks begin lifting one side of the RV, or even when people start walking around inside the coach. Slides extending or water tanks filling can also change the way weight is distributed inside the RV.
In some situations, especially on sloped campsites, an unsecured RV could even begin to slowly roll away. While that kind of situation is rare, it is exactly the type of problem wheel chocks are designed to prevent.
By placing wheel chocks firmly against the tires as soon as you park, you stop that movement before it can happen. The chocks block the tires from rolling forward or backward and help keep the RV stable while you finish the rest of your campsite setup.
This simple step gives you a solid starting point for everything that comes next.
Once the wheels are secured, you can move on to leveling the RV, lowering stabilizers, and connecting campground utilities like electricity, fresh water, and sewer. With the wheels properly chocked, you can complete those steps with confidence knowing the RV will stay exactly where you positioned it.
For experienced RV owners, placing wheel chocks becomes second nature. It’s one of the first things they do after backing into a campsite, and it helps ensure the rest of the setup process goes smoothly every time.